Happy Birthday, Pumpkin!

Monday, October 23, 2017
My one and only sweet, amazing, wonderful, and beautiful sister celebrated her birthday this last week!  We are only 17 months apart so we were pretty much raised as twins.


I love this girl more than words can say.  There are so many things I love about her.  She just gets me.  I don't even have to say a word and she will know what's on my mind.  We have the exact same laugh.  Identical.  It's scary.

I also love that over the past ten years she has kept every one of the cards I've made her (awww!!) and last night I was able to give her another one to add to the collection.


In all the years I've been stamping I don't remember ever making my sister a "halloweeny" card and since my Spooky Night designer paper has been on my desk staring at me for awhile I thought it was time.

This card is also for two challenges this week!  The first challenge is for this week's City Crafters Challenge which is pumpkins!  This is also my entry for this week's Featured Stamper on Splitcoaststampers (congrats Jeanette!).  Every week I want to participate and every week something always comes up BUT this week was no excuses, especially when I saw THIS card!


I changed the size of the card (mine is 4x4) and since I do not have any green polka dot patterned paper I opted for the polka dot pattern from the Spooky Night designer series paper pack but the rest of the colors I tried to stay as close to Jeanette's card as possible.  I also realized I do not have any sentiments with the word pumpkin in it so I went with a simple Happy Birthday from my Sunshine Sayings stamp set.

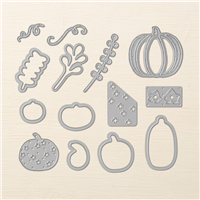
The pumpkins are die cut from the Patterned Pumpkins Thinlits and since I have no washi tape that would coordinate, I pulled out some Basic Black and Pumpkin Pie grosgrain ribbon (sorry, it's retired) and attached it with a simple staple.

To add the smallest little bling, I put a black sequin on the orange pumpkin and popped the entire panel up on Stampin' Dimensionals.

I haven't had a chance to stamp in so long and was surprised at how quick this came together!  I am hoping to do a matching scrapbook page sometime this week using the same paper.  I am now officially in love with this paper. Seriously.


3

Paper Pumpkin: Pining for Plaid

Friday, October 20, 2017
Hello stampers!

I cannot believe it's been TWO whole months since I've posted anything!  Back to school hit me hard this year guys.  Anyone feel me?  I have one child in band and football and another child in orchestra as well as church groups, clubs, and going back to work after having the summer off!  Add all that to the normal day to day activities and you've got one exhausted mama!

That's what I love about Paper Pumpkin! It's the perfect project for those of us that have zero time to stamp..

This month's Paper Pumpkin is one that I have been looking forward to for awhile.  Both the October and November kits are coordinating and I was so excited to see part one!


When I went to get the mail yesterday I just happened to have my phone in my hand so when I opened the mailbox (and squealed with delight) I just had to take a picture of how the box looked in my mailbox.


Let me just say, I am a sucker for plaid!  Usually if the box is different than the normal Paper Pumpkin box it means that it coordinates with the project.  I couldn't get inside fast enough to see what this months' project is!  Pining for Plaid sounds intriguing...


It's Christmas in October!!  It is a gorgeous set of shaker cards!  It has been awhile since I've done a shaker card so that's awesome and then there is that beautiful plaid.


Cherry Cobbler is one of my favorite Stampin' Up! colors and take a look at those stamps!  I am in LOVE with the font and the sentiments are classics!  It's such a wonderful set! 

If you would like to see how easy this kit is to put together check out this video from Stampin' Up!

And if you're not a Paper Pumpkin subscriber yet what are you waiting for???  You can JOIN THE FUN and have next month's kit delivered to you after November 10th, just in time for the holidays!  When you subscribe you also have the opportunity to purchase past kits while supplies last so it's never to late to get your Paper Pumpkin on!
1

Hope Is On Its Way

Tuesday, August 15, 2017
I participated in a swap this weekend!  Why am I excited?  Because I haven't done a swap in YEARS!  I have to admit, I was pretty nervous.  The swap was within my upline's Stampin' Up team and the ladies that enter the swaps are so incredibly talented!  But I took a deep breath, sat down, and attempted to create my swap.

I came up with nothing.  So it was on to my old standby: Pinterest.  It was while browsing that I came across THIS CARD by Michelle Long and fell in LOVE!  So I cased it.


I did change up a few things on my version of Michelle's card but they were small little tweaks to make the design more my own.

I started with a Whisper White card base and cut another Whisper White panel which I ran through my Big Shot and used the Softly Falling embossing folder.  I featured the Sunshine Wishes thinlit set on this card and used Soft Sky for the heart, Daffodil Delight for the 'hope,' and Wild Wasabi for the little flower.


I stamped the 'is on its way' sentiment, from the Sunshine Wishes stamp set, in Wild Wasabi onto Whisper White cardstock, hand cut the sentiment out, and popped it up on dimensionals.  The 'hope' is also on dimensionals.

To give a little extra bling I added a few So Saffron sequins from the Assorted Iridescent Sequins set and a bit of Whisper White Bakers Twine onto the flower.

I loved how this card turned out so much that I actually made two extras for me to keep and give away.  If you can't tell I am loving the Sunshine Sayings bundle!

Products Used
0

Sending Sunshine with Sunshine Sayings

Friday, August 4, 2017
Happy Friday!

This summer has zoomed by SO fast!  I can't believe I am already getting geared up for back to school.  I have two middle schoolers that are both in extracurricular activities this year so it's going to be an insane but exciting year!

I managed to squeeze a little bit of stamping time this morning before heading off to another doctor's appointment so I actually have some eye candy for you today!


I used the Delightful Daisy designer paper as my color inspiration for this card.  I started with an Old Olive card base and really wanted the designer paper to shine so I kept the main panel very simple with one piece of Delightful Daisy designer paper piece matted on Whisper White cardstock.


I cut the sunshine sentiment using my Big Shot and the Sunshine Wishes thinlit dies and glued them right onto my designer paper.  I stamped the sending & hugs in Old Olive on Whisper White cardstock, used my paper snips to cut them out, and popped them up on dimensionals.
I finished off this simple card by tying some Smoky Slate gingham ribbon around the bottom and popping the entire panel up on dimensionals.

This is not a normal color scheme I would go for but I am digging it!  It's nice to get out of your comfort zone every once in awhile. ;)

Products Used
0

Christmas In July with a Flurry of Wishes

Wednesday, July 19, 2017
Every year I have good intentions.  I want to make and mail out all my Christmas cards and every year I run out of time.  This year I refuse to run out of time so I am starting early!  

This week's Clean and Simple Cards Challenge on Splitcoaststampers is perfect to get me in the holiday spirit: Christmas in July


One of my favorite Christmas sets that did not get a lot of love last season was Flurry of Wishes.  What can I say, I am a sucker for snowflakes and tend to collect more sets than I use.

I really wanted to keep this card clean with a lot of white with a splash of color.  I decided on a white on white using Whisper White cardstock.  I rounded two of the corners of the 4x5.25 panel using my Envelope Punch Board and stamped the main sentiment from Flurry of Wishes in Basic Black.

The snowflakes were stamped in Pool Party and Smoky Slate and I highlighted the snowflakes with a few Pool Party iridescent sequins.


The whole panel was popped up on dimensionals and I punched a small hole to thread the Smoky Slate ribbon through and tided a nice, fluffy bow.  I can't tell you how excited I am to start on my Christmas cards early and this one is so simple it can be easily replicated.

Color Combo Inspiration


Christmas in July Starter Kit Special

Speaking of Christmas, how would YOU like to receive an early Christmas present???  For the month of July, Stampin Up is giving you a starter kit special!  ANYONE that gets the starter kit will receive a:

  • bone folder
  • paper snips
  • grid paper
  • two block D clear blocks
  • snail adhesive

All for FREE!!  But that's not all!  You will get to pick $125 worth of product from the new catalog AND you will also get a free Paper Pumpkin kit!  All of this would cost you around $235 retail but it's all yours for $99 plus tax.  Oh and did I mention FREE shipping?!  It's a no brainer!  

There are more perks to taking advantage of this special!  You will get a 20% discount on all Stampin Up products through December as well as being able to attend exclusive demonstrator only events!!  Best of all, you will be apart of the Sweet & Sassy team and I love to spoil my team!

If you're interested in taking advantage of this offer or have any questions please contact me (link is sidebar)!  You have until July 31st to decide! :)

Products Used
2

Paper Pumpkin: Positively Picturesque

Monday, July 17, 2017
July's Paper Pumpkin kit just arrived!!  This month's kit is called Positively Picturesque and it is hands down my favorite kit since April's kit, A Sara Thing.


Isn't it adorable?!  If you scroll through my blog you will see how much I love hearts and four of the cards in this month's kit has hearts.  *happy dance*  This kit also has TWO ink spots, one of which is one of the new In Colors, Tranquil Tide, which I haven't had a chance to play with yet!!


Don't you just love the fonts used in this kit?!  The sentiments are perfect for multiple occasions and the little suns and cloud are too cute!  I could see using this set for so many other cards and projects.


I think my favorite part of this kit are the colors!  All but one of the colors included in this kit are new In Colors!  Lemon Lime Twist, Powder Pink, Tranquil Tide, and Soft Sky.  Gorgeous color combo!


I also adore the embellishments included in the kit.  The wood words and flowers, grass pieces, and washi tape are so fun!


Normally when I get a Paper Pumpkin kit I look for alternatives I can do with the kit instead of using the projects the kit is intended for, but this month I am keeping the kit as is.  It's too cute to mess with!  If you would like to get your hands on this kit, and are not a current Paper Pumpkin subscriber, email me!  I will be happy to give you all the information you need to get started.


If you'd like to subscribe to Paper Pumpkin, but are unsure how to do it, this video is extremely helpful and walks you through the process step by step.  Don't forget to add me as your demonstrator!
0

Congrats with Sunshine Wishes

Monday, July 10, 2017
I don't know about you guys but this summer has been insane!  I feel like ever since school let out it has been nonstop for me, which sadly means no stamping time.  I managed to squeeze in a little time and I am so excited to share what I've created with you!

July is my favorite month.  I LOVE the 4th of July and it's also my baby's birthday on the 18th.  I haven't been able to order anything from the new Memories & More line from Stampin' Up yet, but I am really wanting to scrapbook more, so I decided to make my own layout for my birthday boy!


I am lucky that D's favorite colors are blue and red which is perfect for his patriotic birth month.  I started the layout off with a piece of Basic Black that measures 4"x 6".  I cut the Marina Mist layer slightly smaller and used my new Oh My Stars embossing folder to give the page that patriotic feel. 


The heart and the congrats are from the Sunshine Wishes thinlits set which is SO stinkin' cute!!  I don't know why I waited so long to get this into my collection!  I left a Basic Black square as a mat for a picture of the birthday boy.

I used my Banner Triple Punch to create the little banner under the congrats in Whisper White cardstock and used the "on one more year" sentiment from the Sunshine Sayings set in Marina Mist ink.  This panel is also popped up on dimensionals to give the page a little depth.

I wanted a little something on the heart so I used a piece of Smoky Slate Gingham ribbon to create a little knotted bow.  I tried to keep it as masculine as possible but I've been dying to use this ribbon!


For the 3"x4" panel, I wanted some space to do a little journaling so I wanted to keep it very simple.  I stuck with the same Basic Black base but to give it more color I cut out a circle using my Layering Circles dies and stamped the flower from Sunshine Sayings in Marina Mist, Real Red, and Smoky Slate and cut the circle in half.  To tie in the flowers, I used the small flower from the Sunshine Wishes die set and cut out a flower in Marina Mist cardstock.

For the actually journaling panel I layered a piece of Whisper White onto a piece of Real Red.  I was trying to get this done before company came into town so I do not have the actual measurements for the journaling panel.


The other 3"x4" panel is just a piece of Basic Black cardstock because I plan on having another picture there.

I LOVE how this page turned out and I cannot wait to get my Memories & More album so I can see it in the pocket pages.

If you haven't checked out the Memories & More line in the new 2017-2018 annual catalog you NEED to.  It is AMAZING!!

This layout is also my entry into the current SUO Challenge which is Summer Fun! Nothing says summer fun like a red, white, and blue birthday layout!! ;)

Products Used:

7

Paper Pumpkin: One in a Melon

Tuesday, June 20, 2017
I have started this summer out sick which is no fun whatsoever.  I hate going to the doctor but I finally threw in the towel and went this morning.  I have a sinus infection which is what I figured.  Since I've had more than four this past year I am now getting put on two daily allergy medications on top of the allergy medications I already take.  If it's going to help me feel better I'm all for it but good gosh!  Anyone else struggling with allergies more this year or is it just me?

One bright spot in my sick haze was the arrival of this month's Paper Pumpkin!  There is nothing like opening up my mail box to see this...


I couldn't wait to tear into it and was even more excited when I saw the stamps and the two fun and summery colors included in this month's kit: Melon Mambo and Emerald Envy.


I haven't had a chance to work with Emerald Envy so that got a squeal from me (which was quickly followed by a cough!) and I could already tell there was going to be something summery and fun inside.


Say hello to One in a Melon!  Isn't it adorable?! The little watermelon bags are what really steal my heart with this kit.  I also love the sentiment that you stamp on the front of the envelopes.  I love to decorate envelopes when I have the time and this sentiment is perfect!


Here you can see the entire kit laid out.  The fun, bright colors are a perfect kit to kickstart summer and I cannot get enough of that watermelon tissue paper!  So fun!


I haven't had a chance to put anything together yet but I'm already thinking about ways to alternate this kit and what I'm going to put inside those adorable watermelon bags.  What else am I supposed to do when I'm laid up right?! ;)

Paper Pumpkin Pre-Paid Subscription Options
0

You Warm My Marbled Heart

Thursday, June 15, 2017
Tuesday night we celebrated my moms birthday.  Doesn't she look AMAZING for 55!!

Christi Flores - The Sweet Sassy Stamper thesweetsassystamper.blogspot.com #thesweetsassystamper

 My mother's favorite color has always been blue so I knew when I sat down to make her card that I wanted to do varying shades of blue.  I also can't get enough of my Sweet & Sassy Framelits Dies which highlights my newest stamp perfectly.

Adorable birthday card using the new Marbled Backround stamp from Stampin Up!  I also found a new use for the leaves stamp in Sheltering Tree set. #thesweetsassystamper

I started out with a Whisper White card base that is the standard 5.5x2.25 and added another Whisper White panel that is 4x5.25 that is popped up on dimensionals.  I used the leaves stamp from the Sheltering Tree stamp set to create the background which was stamped in Night of Navy and Marina Mist.

The heart is my favorite part of this card because I got to use my new Marbled background set!!  I used sponge daubers and dabbed four different ink colors all over the stamp: Marina Mist, Night of Navy, Pacific Point, and Tempting Turquoise and stamped the image on Whisper White cardstock.  I then used my Sweet & Sassy Framelit Dies to cut the center heart.  I wound some Silver Metallic Thread and used some Tear & Tape to place it behind the heart and popped the heart up on dimensionals.

I stamped the sentiment from Sheltering Tree in Night of Navy which finished off this card nicely.  My mom loved it (I knew she would!) and I have to admit I love it too!  I love using stamps for other things besides their intended purposes! :)

Supply List
0

Stampin' Up's New 2017-2018 Annual Catalog!!

Thursday, June 1, 2017
Yes that's right! The new catalog is NOW AVAILABLE and it is amazing!!!


If you need a new catalog please email me and let me know and I will get you one!

Don't forget when you order to use the current host code J9MHTDFW on your order and get a free gift from me from the new catalog!  If your order is over $150 please OMIT the host code.

What is your favorite product from the new catalog?  Mine is definitely the Love Today Planner Kit which you can see for yourself on the Stampin' Up! YouTube page. :)


Isn't it amazing?!  SO many possibilities!  I am thinking it's time for me to start planning a planner class. ;)
0

Teacher Appreciation

Wednesday, May 31, 2017
My sister contacted me a few weeks ago and asked me to make her something special for two of my nephew's teachers.  My nephew has a learning disability and these two teachers have went above and beyond for my nephew over these past several years, so my sister wanted something that would show that appreciation.


I fell in love with the Window Box bundle in the Occasions catalog and am so excited it made it to the 2017-2018 Annual Catalog!  I haven't had much time to play with it, but when my sister said she needed a teacher gift I knew exactly what I wanted to do.  


I used the Window Box Thinlit Dies to cut my Whisper White cardstock to make the box itself.  This box is pretty much one whole piece of 8 1/2 x 11 cardstock to give you an idea of the size.  My sister wanted the box to open on the side as opposed to the top so I used these instructions to create the box, stamped the hearts and circle stamp from the Window Shopping in Smoky Slate, and assembled the boxes using my multipurpose liquid glue.


I still had some Bermuda Bay glimmer paper from the Sale-A-Bration catalog that I have been hoarding that was the perfect accent to these boxes.  Even though this particular glimmer paper is no longer available I did find this awesome tutorial showing how you can make the Dazzling 
Diamonds Glimmer Paper into whatever color you want!


On this box I used the Blushing Bride Glimmer Paper which is on SALE right now! Today is the LAST day to get your hands on this beauty before it's gone!  Tomorrow kicks off the NEW CATALOG and I can't guarantee that this paper will be on clearance or not so get some while you can!

I cut out the hearts using the Sweet & Sassy Framelit Dies and my Big Shot and popped them up with Stampin' Dimensionals onto the different sides of the box, and stamped the 'Thinking of You' sentiment in Smoky Slate, and used my Triple Banner Punch for the edges.

I finished off the boxes with another Sale-A-Bration item that is not currently available: the 3/8" Metallic Ribbon.  I love how it gave that extra bit of soft shimmer to the entire look of the boxes and it is what is keeping the boxes closed.  I did tape a piece of cardstock over the ribbon on the bottom so the ribbon would stay in place even when the ribbon is untied or pulled off.  

My sister loved the boxes and I hope my nephew's teachers will feel the love that went into them as well. :) 

Don't Forget...

TODAY is the LAST day of the 2016-2017 Annual catalog and the Occasions catalogs!  TODAY is also your last day to use the May hostess code (May 2017 hostess code: BEM6XB7Z) on your order to get a little something from me so get those orders in!! If you need me to order something you can email me at mysweetsassylife@gmail.com and I will be happy to put your order in for you.  Happy Shopping!! 

Products Used

2

Two Hearts Become One

Sunday, May 28, 2017
A few weeks ago I received a call from my sister who informed me that two of my friends went to Las Vegas and got married!  My friends are very low key so this is definitely their style but all of their family and friends wanted to share in their wedded bliss so yesterday we attended their wedding reception!  It was wonderful!  Even though the did not want any gifts, I had to make them a little something to celebrate the occasion. 

Going through my stamp collection, I quickly realized I did not have anything that was fit for a wedding reception, so I had to get a little creative and think outside the box.


I started started off with a Whisper White card base and added another Whisper White panel that is 1/2 inch smaller than the card base and popped the panel up with Stampin' Dimensionals.  I cut out two hearts from the Cupcakes & Carousels designer paper (that is retiring and on SALE right now!) using my favorite die set, Sweet & Sassy Framelits Dies, and used my Stamping Sponges to ink the edges of the hearts in Chocolate Chip ink.

My favorite part of the card has to be the gold sequins that I positioned all over the card to give it that little extra bling using my Fine Tip Glue Pen.


I finished off the card with one item that is not Stampin' Up! and that is the sentiment which is from a set from Verve Stamps called Chevron Love.  You better believe that once the new catalog is available June 1st that I will be purchasing a set fit for a wedding/anniversary but I'm so thankful that I had this set!

Don't Forget...

The retiring list is available until Wednesday!  Everything is while supplies last so don't delay in getting your orders in!  If you do a search on my site for something that you want and nothing pops up, that most likely means that particular item is sold out, and is no longer available.  Don't forget to use the hostess code (located on my sidebar) on your order to get a little something from me as well.  Happy Shopping!!

Products Used
0

Paper Pumpkin: Perfect When You're In A Pinch

Tuesday, May 23, 2017
I hate to admit this but I have been in a creative rut these past few months.  I'm not sure what my deal has been!  I will sit down to create something, and instead of a finished product I leave the card or project halfway finished on my desk.  So frustrating!
Where do you go when you need a quick card and you have ZERO mojo?  Paper Pumpkin


I am SO in love with April's Paper Pumpkin kit!  The watercoloring is so much fun and I love the bright and bold colors!  Since my creativity is on vacation right now I stayed true to the kit design for this card but I colored the watercolor heart all pink with a few hints of purple.

The flower embellishments are gorgeous but I wanted to add a little more bling so I used some silver metallic sequins from another kit in the centers to really make them pop.

My May Paper Pumpkin kit came last week and I haven't had a chance to get it out and play yet but I'm hoping it might help spark something.  Do you ever have those creative rut times or is it just me?  This month has been so crazy busy but that's what I love about Paper Pumpkin!  It's all right there for you and it takes all the "thinking" out of the equation!

Check out this SWEET Paper Pumpkin promotion!!


If you've never subscribed to Paper Pumpkin before now is the time!!  Anyone that subscribes to Paper Pumpkin between now and June 10th and enters the promo code "STARTHERE" will get 25% off their first three months!!  You can't beat this deal!  Sign up today! :)
0

Sending LipSense Love

Wednesday, May 17, 2017
Last Wednesday was my 36th birthday and I challenged my Sweet & Sassy Stampers Facebook group to make anything that shimmers!  I knew when I created this challenge that I wanted to make something with my Blushing Bride Glimmer Paper and my Sweet & Sassy Framelit Dies and I made this a totally girly-girl creation, just like me! :) 


On April 1st I took the plunge, after several months of debating, and I became a LipSense demonstrator.  I really only signed up for the discount, but several women started asking me about ordering and now I'm getting customers and starting to grow a business!

I wanted to show my LipSense customers my appreciation for their orders AND give them a taste of what Stampin' Up! has to offer, so I created these cute little 3x3 note cards using the Sealed with Love stamp set from the Occasions catalog.

I used the Softly Falling embossing folder for the Basic Black panel and one of the tag dies from the Window Box Thinlit Dies for the "Sending Love" sentiment.  A piece of Bermuda Bay Thick Bakers Twine adds a splash of color and a beautiful dimension to this card.

Thank you so much for stopping by today!  Happy stamping!

Products Used:
0